
Window and façade frame insulation
Seal the gap between window or façade frames and the wall for air, wind and water tightness, and a stiffer frame.
MULTIFOAM PRO 5145 · DIN 4102 B2
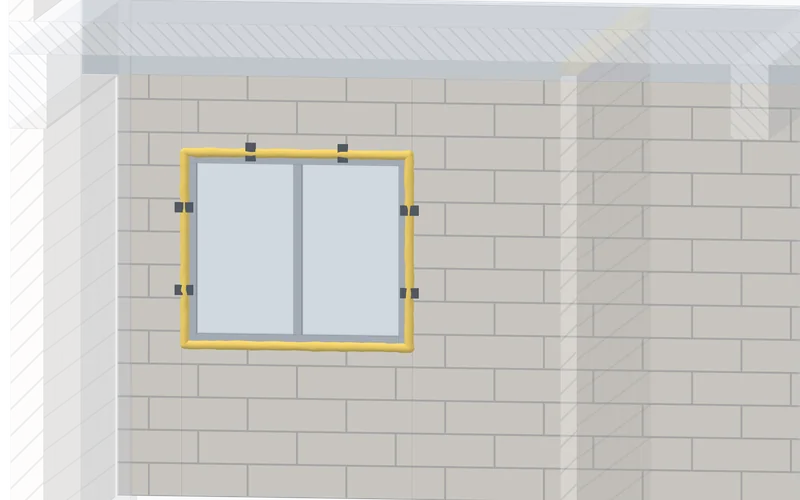
Why the gap matters
The gap between a window or curtain-wall frame and the wall is the weakest point of the envelope. Mortar filling is rigid, cracks as the frame moves with heat, and lets in wind, rain and noise.
A silicone bead on the face seals only the visible line. The cavity behind the frame stays open, and that is where air, water and noise get through.
MULTIFOAM fills the whole gap with an elastic, closed foam that moves with the frame, keeps water out and cuts sound and heat transfer. It also stiffens the frame, so it rattles and flexes less.
Window and façade frames still need mechanical anchors. MULTIFOAM is the seal and the insulation, not the fixing.
Seven steps to a sealed frame
Anchors on the jambs and head carry wind load and the weight of the glazing; the foam seals the gap.
Plan a 10–12 mm gap
Set the frame in a well-cured plastered wall with shims of 10–12 mm all round. Not into POP or gypsum plaster.
Tip: Plan the gap when the opening is designed. It cannot be added once the structure is cast.
Set it true
Check plumb, level and both diagonals with a spirit level before you screw.
Tip: Any misalignment is locked in once the foam cures.
Anchor the jambs and head
Screw external frames into the cured wall as the window or façade system specifies, on both jambs and the head.
Tip: Typically no more than 700 mm apart, the first anchor within 150 mm of each corner. The foam is the seal and the insulation, not the fixing.
Leave the sill unscrewed
Don't screw through the bottom track or sill face. With fixing on three sides, the bottom need not be screwed.
Tip: Screw heads in the bottom track are the root cause of window leakage.
Mask, clean and fill
Mask everything except the bonding face, blow out the dust, shake the can about 20 times, then fill from the bottom up to about 80–85 %.
Tip: Foam in layers if the gap is deeper than 50 mm. In very hot weather, sprinkle water on the wall first.
Let it cure
Leave it 5–8 hours, depending on humidity, and don't move the frame.
Trim and cover
Slice off the excess any time from the next day, peel off the masking, and cover the foam: it is not UV-stable.
Tip: Inside: architrave, putty or gypsum. Outside: elastomeric paint or architrave, and polysulphide sealant at the sill.
Key data for windows and façades
| Sound insulation R(st,w) | 61 dB |
|---|---|
| Thermal conductivity | 0.0381 W/m·K |
| Water absorption | < 2 vol-% |
| Service temperature of cured foam | –40 to +80 °C |
| Vapour permeability | µ = 19 |
| Fire class | B2 (DIN 4102) |
Data from MAPURA TDS edition 07/2025, at 23 °C / 50 % r.h., non-aged foam.
Used on site
Used by Hiranandani, Rustomjee, K. Raheja Corp and leading façade contractors.
The results exceeded our expectations. The product demonstrated remarkable strength, durability, consistency, and ease of application.